We ended the previous tutorial bt briefly introducing loader functions. In this tutorial, we will discuss them in more detail and see how they can be used to fetch data for our routes.
Loader Functions #
import { createFileRoute, notFound } from '@tanstack/react-router'

export const Route = createFileRoute('/user/$id')({
  component: RouteComponent,

  notFoundComponent: () => <div>User not found.</div>,

  loader: ({ params }) => {
    if (Number(params.id) > 10) {
      throw notFound()
    }
  },
})

function RouteComponent() {

    const { id } = Route.useParams()

  return <div>Hello "/user/{id}"!</div>
}
In the above code, we have defined a route for /user/$id with a loader function. The loader function runs whenever there is a match in the route. There are other functions that can be defined in the route, there is beforeLoad function that runs before the loader function. A authentication check is preferable to be done in the beforeLoad function. Because if the user is not authenticated, we can redirect them to another route before running the loader function.
With the loader function, we can fetch data from an API or a database. How would we do that? As an example, let’s create a simple object that contains user data inside the loader function.
loader: ({ params }) => {
    if (Number(params.id) > 10) {
      throw notFound()
    }

    const response = { name: 'Pasindu', id: params.id }
    return response

  },
Whatever we return from the loader function can be accessed inside the route component using the useLoaderData hook.
function RouteComponent() {

    const { id } = Route.useParams()

    const response = Route.useLoaderData()

  return <div>Hello {response.name}</div>
}
Now, when we navigate to /user/1, we will see “Hello Pasindu” on the screen. This probably doesn’t seem that cool, but this is mocking the idea of fetching data.
Fetching Data from an API #
To test fetching data from an API, we can use the JSONPlaceholder API. Let’s use their /users endpoint to fetch user data. Let’s fetch the user data from the API and show them inside our route component.
import { createFileRoute, notFound } from '@tanstack/react-router'
export const Route = createFileRoute('/user/$id')({
component: RouteComponent,
notFoundComponent: () => <div>User not found.</div>,
loader: async ({ params }) => {
if (Number(params.id) > 10) {
throw notFound()
}
const response = await fetch('https://jsonplaceholder.typicode.com/users');
const users = await response.json();
return { users };
},
})
function RouteComponent() {
const response = Route.useLoaderData()
console.log(response)
return <div>Hello</div>
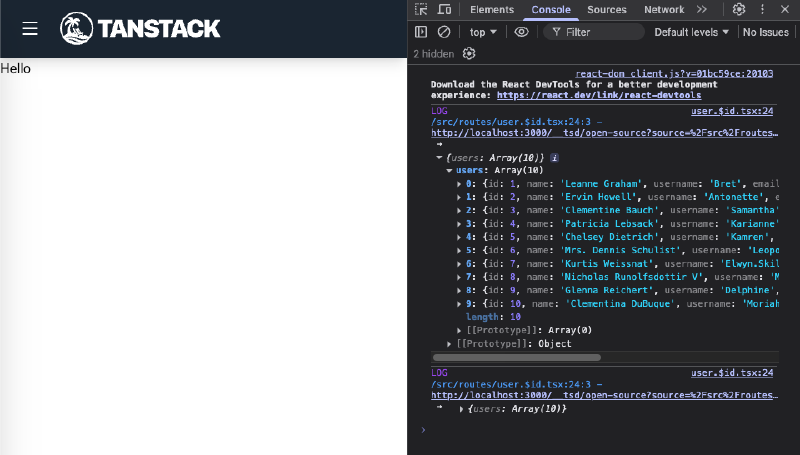
}Fow now, after I’ll just log the response to the console. When we navigate to /user/1, we can see the user data in the console. It should have an array of 10 users.
Now, let’s make it such that it only fetches one user at a time based on the id parameter.
import { createFileRoute, notFound } from '@tanstack/react-router'

export const Route = createFileRoute('/user/$id')({
  component: RouteComponent,

  notFoundComponent: () => <div>User not found.</div>,

  loader: async ({ params }) => {

    const response = await fetch(`https://jsonplaceholder.typicode.com/users/${params.id}`);
    const user = await response.json();

    if (!user.id) {
      throw notFound();
    }

    return { user };
  },
})

function RouteComponent() {

  const response = Route.useLoaderData()

  console.log(response)

  return <div>
    Hello {response.user.name}!

    <h1>Email: {response.user.email}</h1>

    </div>
}
We modified the loader function to fetch a single user based on the id parameter. If the user is not found, we throw a notFound error. In the route component, we display the user’s name and email.

Handling Errors #
There are couple of things that are important here. What if during the request, there is an error? That’s an important case to handle. The way we can handle this is before is before we distucture the json response, we can check if the response is ok. If not, we can throw a generic error.
When we throw a generic error, what does the user see? By default, they will see a blank page. To handle this, we can define an errorComponent in the route.
The final code will look like this:
import { createFileRoute, notFound } from '@tanstack/react-router'

export const Route = createFileRoute('/user/$id')({
  component: RouteComponent,

  errorComponent: ({ error }) => <div className='text-red-600'>Error: {error.message}</div>,

  notFoundComponent: () => <div>User not found.</div>,

  loader: async ({ params }) => {

    const response = await fetch(`https://jsonplaceholder.typicode.com/users/${params.id}`);

    if (!response.ok) {
      throw new Error('Failed to fetch user data');
    }

    const user = await response.json();

    if (!user.id) {
      throw notFound();
    }

    return { user };
  },
})

function RouteComponent() {

  const response = Route.useLoaderData()

  console.log(response)

  return <div>
    Hello {response.user.name}!

    <h1>Email: {response.user.email}</h1>

    </div>
}
Showing Loading States #
While this API call is pretty fast, in a real world application, we would want to show a loading state while the data is being fetched. There is pendingComponent that can be defined in the route to show a loading state.
pendingComponent: () => <div>Loading user data...</div>,These are just some of the basics of using loader functions in TanStack Router. There are lot more you could as well. If you look at createFileRoute and what it accepts, there are many other functions that can cover almost every edge case you can think of when it comes to routing and data fetching. I do recommend checking out the official documentation for more details.
Server Functions #
A server function in TanStack Start is like the name implies, a function that you sure only run on the server. It’s a bit different from loader function where it runs on both the server and the client technically. When we setup the TanStack Start project, we already have a example server function created for us in src/routes/demo/start.server-funcs.tsx. If you visit http://localhost:3000/demo/start/server-funcs, you will see the server function in action. In that page you can add todos and they will be stored in memory on the server.
Let’s take a look at this file and try to understand what’s happening. We can see that there is a const Route = createFileRoute('/demo/start/server-funcs') that defines the route. It also has a loader function, but it calls the getTodos function. The component that is rendered in this route is Home. It has bunch of stuff in it. It uses the useLoaderData hook to get the todos from the loader function. It also has const router = useRouter() to get the router instance. We can use useRouter hook to get information about the current route, navigate to other routes, and more.
The important part here is where is the todo list stored? If you check the getTodos function, you see that this function calls another called createServerFn. createServerFn is used to create functions that run only on the server. With createServerFn, it’s like a special API endpoint that you don’t have to write twice. If we want to get todos, normally you would write an endpoint that returns the todos, then in the client you would write a fetch call to get the todos. But here you create getTodos function using createServerFn, you specify the method and in the handler you deal what does it mean to get the todos. So in the readTodos handler, you could write a query to the database to get the todos. Then in the client, you can just call getTodos() and it will call the server function for you and return the todos. The readTodos function uses nodejs to read your filesystem and update the todos.json file. Reading and writing files is something that can only be done on the server, so this is a good use case for server functions.
Mutations #
Server functions are also important for mutations. Mutations are operations that change data, like creating, updating, or deleting data. In the example, there is a addTodo server function that is used to add a new todo.
const addTodo = createServerFn({ method: 'POST' })
  .inputValidator((d: string) => d)
  .handler(async ({ data }) => {
    const todos = await readTodos()
    todos.push({ id: todos.length + 1, name: data })
    await fs.promises.writeFile(TODOS_FILE, JSON.stringify(todos, null, 2))
    return todos
  })
As you can see, it uses createServerFn to create a server function that handles POST requests. Inside the handler, there are couple of things that are pretty cool. The first thing is the inputValidator. This comes built in server functions which allows us to validate the input data before it reaches the handler. In a post request, the data is sent in the request body. When we call addTodo from the client, we pass the todo name as a string. The inputValidator checks if the data is a string before it reaches the handler. Inside this validator, you can use libraries like Zod or Yup to validate complex data structures.
Static Server Functions #
In regualar server functions, they run on run time. This means that every time you call the server function, it runs the handler code. But there are cases where you want to run some code at build time and have the result be static. That means that the result is pre-computed and served as a cached response. During the pre-rendering of the route, the function will run, will produce some data, and that data will be stored as a json file that can be instantly be served to the client without ever having to hit the server again. Obviously, you would use less static server functions compared to regular server functions. A practical use case for it would be like if you are fetching data that doesn’t change often, like a product list for an e-commerce site. You can use a static server function to fetch the product list at build time and serve it as a static response. You have to explicitly tell the server function to be static by passing type: "static" to the createServerFn function.
const getStaticData = createServerFn({ type: 'static', method: 'GET' })
  .handler(async () => {
    // Fetch data from an API or database
    const data = await fetch('https://jsonplaceholder.typicode.com/posts');
    const posts = await data.json();
    return posts;
  });
Middlewares #
One of the most powerful things you can do with server functions is how you can handle what happens right before the handler runs. Middlewares let you wrap a server function with extra functionalities that run before of after the handler. There are many use cases for middlewares, like authentication, logging, error handling, etc.
Let’s create a middleware.ts file inside the root of the src folder. In the top of the file, we will add import { createMiddleware } from "@tanstack/react-start" to import the createMiddleware function. Then we can create a simple auth middleware that checks if the user is authenticated before allowing them to add a todo.
import { createMiddleware } from "@tanstack/react-start";

function auth() {
    return Math.random() > 0.5 ? true : false;
}

export const authMiddleware = createMiddleware({ type: "function" }).server(
    async ({ next }) => {
        if(!auth()) {
            throw new Error("Unauthorized");
        }
        return next();

    }
)
In the above code, we created an authMiddleware that checks if the user is authenticated using a simple auth function. If the user is not authenticated, it throws an “Unauthorized” error. If the user is authenticated, it calls next() to proceed to the next middleware or the handler. The way we use this middleware is by chaining it to the server function using the middlewares method. You can pass an array of middlewares to the middlewares method.
const addTodo = createServerFn({ method: 'POST' })
  .middleware([authMiddleware])
  .inputValidator((d: string) => d)
  .handler(async ({ data }) => {
    const todos = await readTodos()
    todos.push({ id: todos.length + 1, name: data })
    await fs.promises.writeFile(TODOS_FILE, JSON.stringify(todos, null, 2))
    return todos
  })
In the above code, we added the authMiddleware to the addTodo server function. Now, whenever we call the addTodo function, it will first run the authMiddleware to check if the user is authenticated before proceeding to add the todo.