TanStack is a new open source, full-stack web framework designed for building modern web applications with React and Solid. It provides a modern, type safe development experience, with features like server-side rendering, streaming. Recently, if you are active on X, you might have seen a lot of people moving to TanStack from other frameworks like Next.js. In this series, we will see what is this hype about TanStack. We won’t be covering everything about TanStack in this series, but we will cover the basics to get you started. We will learn fundeamentals of TanStack, how to create routes, server functions and caching.
To efficiently follow along with this tutorial, you should have a basic understanding of JavaScript, TypeScript, and React.
Setting Up the Project #
In order to get started with TanStack, there are couple of ways which you can do that. If you go to the TanStack docs, you see one of the options is to use gitpick to create a new TanStack project. There are some biolerplates available as well with authentication and other basics. When you start a real project, you usually know what you need, so you can choose the biolerplate accordingly.
We are going to use the command that will get you set up using TanStack Start immediately. This command is great because it allows you to choose the options you want for your project.
npx create-tsrouter-app@latestWhen you run this command for the first time, it will ask you to install create-tsrouter-app globally. Then, it will prompt you to choose a name for your project, then it’s gonna ask what type of router we are going to use. TanStack Start obviously uses TanStack Router. It is an amazing routing provider that competes with React Router and Next.js App Router. It’s very similar in certain ways to those routers. It supports both file-based routing and code-based routing. The different between the two is that file-based routing automatically creates routes based on the file structure, while code-based routing requires you to define routes manually in your code. For this tutorial, we are going to use file-based routing.
Then it will ask us if we would like to use Tailwind CSS for styling. You can choose whatever you want, but for this tutorial, we are going to use Tailwind CSS. We are not going to focus on styling in this tutorial, so the options you choose here won’t matter much. Finally, it will ask to choose a tool chain. I personally haven’t worked with Biome before, so I have worked with ESLint, but this is not specific to TanStack, so I’m going to choose None.
Then the cool part, it will ask what add-ons we would like to include in our project. There are some great options here, like authentication, database, store, deployment, and more. We can build a project without any of these add-ons, but with this command, we can choose different packages and setups that will be included in our project. So you dont’t have to do that all over again. It’s similar to using a boilerplate mentioned in their docs. But here you can stack them together as you want. For this tutorial, I’m going to choose Query which is TanStack Query because I think it’s essential to have TanStack Query in any TanStack project. Then I’m going to choose Start which is the full-stack framework. Then I’m going to press enter. After that, it will ask you if you would like to use any examples. Currently, there is only one example called TanStack Chat. We aren’t going to use that for this tutorial, so I’m going to press enter again.
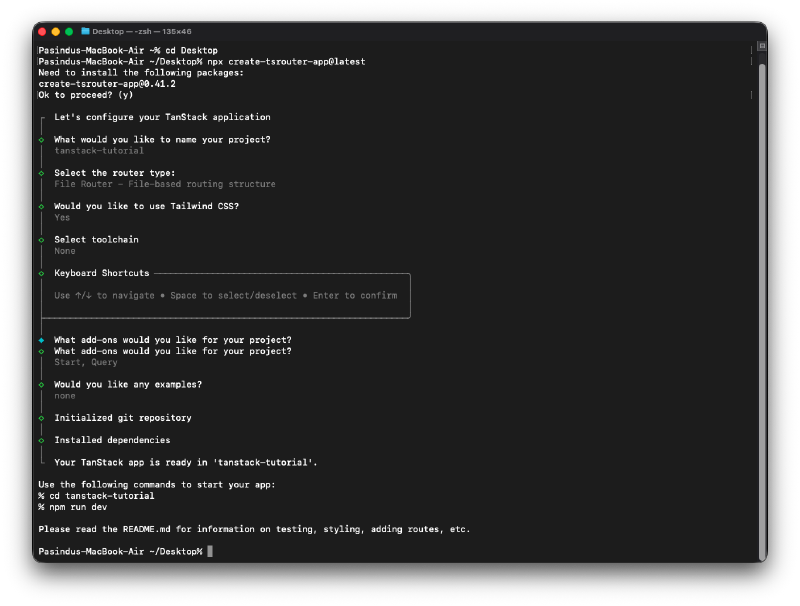
The setup will initialize a git repository, install the dependencies, and set up the project structure. Once it’s done, you can navigate to your project directory and open it in your code editor.
If you check the directory structure, right off the bat, you will see that it’s very similar to a typical React project. If you open the src folder, here is where things get interesting. Because of the options we chose during the setup, it already has some files and folders created for us. The first one is the router.tsx file. This file is a crucial part of defining and configuring the routing in TanStack Start and TanStack Router. We chose file-based routing, so under the src/routes folder, every single file here represents a route in our application. Depending on how you name them, they will serve different purposes.
Running the Project #
It’s time to run the project and see it in action. If you check package.json, you will see that there are some scripts already defined for us. The one we are interested in is the dev script.
npm run dev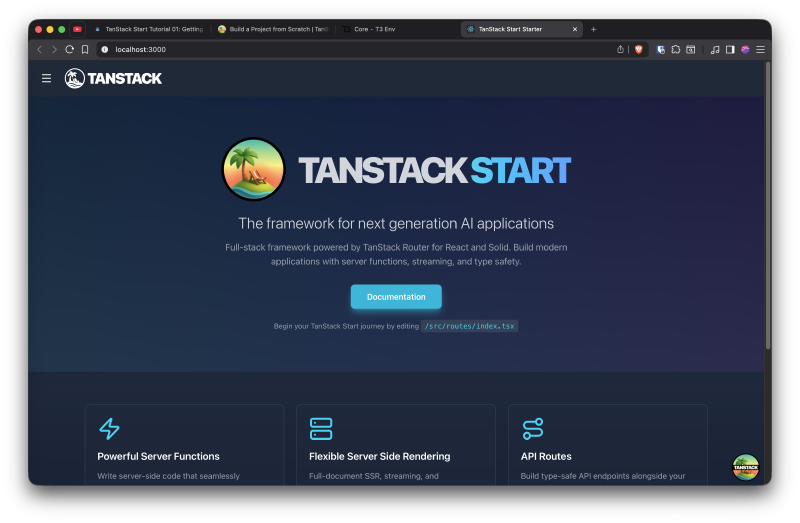
Dev Tools #
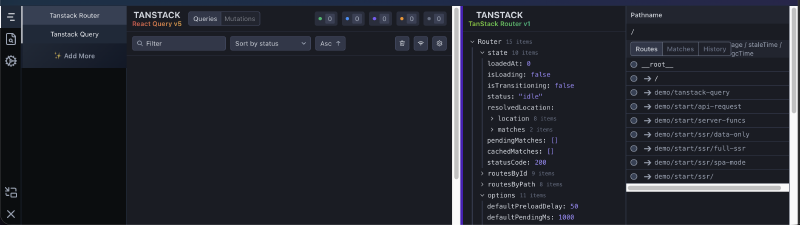
If you look closely, you will see the TanStack logo in the bottm right corner. Every TanStack package comes with dev tools installed by default. You can open the dev tools by clicking on the logo. The dev tools provide a lot of useful information about your application, including the router state, server functions, and more. You can play around it and debug your application with the services you are using. Currently, there are dev tools for TanStack Router and TanStack Query.
When you deploy your application, the dev tools will be disabled automatically.
If you open the hamburger menu on the top left corner, you can see there are couple of routes already defined for us. There are “TanStack Query” route, server functions route, and an API route. This makes it easy to explore and understand how TanStack Start works.
Route Structure #
Understanding the Root Document #
If you open the src/routes folder, you will see that there are some files and folders already created for us. The first one is the __root.tsx file. If you are familiar with something like Next.js this would be like root layout file. It has a component called RootDocument, and it takes in children and the children will be the components that are rendered for each route.
function RootDocument({ children }: { children: React.ReactNode }) {
  return (
    <html lang="en">
      <head>
        <HeadContent />
      </head>
      <body>
        <Header />
        {children}
        <TanStackDevtools
          config={{
            position: 'bottom-right',
          }}
          plugins={[
            {
              name: 'Tanstack Router',
              render: <TanStackRouterDevtoolsPanel />,
            },
            TanStackQueryDevtools,
          ]}
        />
        <Scripts />
      </body>
    </html>
  )
}
Everything around {children} call down here is what shows up on every single page. For example, the Header component is rendered on every page because it’s outside of the {children}. The navbar in the application is defined in the Header component. If you write something below Header component and above {children}, it will show up on every page as well.
There is a component called HeadContent which is responsible for rendering the content inside the <head> tag of the HTML document. This is where you can define meta tags, title, and other head elements that are common across all pages. There is also a component for TanStackDevtools which we saw earlier.
index.tsx #
This file is not the same as the root document. Since we are using file-based routing, this file represents the root route of our application. So when we navigate to /, this component will be rendered inside the {children} of the RootDocument component. In this file, if you are seeing a red squiggly line in export const Route = createFileRoute('/')({ component: App }), it’s because in TanStack Start, all routes are type safe. You might see this error on other routes as well. In TanStack Start, whenever you create a route, the existance of that route and all the configurations, parameters, and everything else are type safe throughout your application. So you never make a mistake.
If you go to the src/components/Header.tsx file, you will see how the navigation is created using Link component from TanStack Router. The to prop is type safe, so if you try to navigate to a route that doesn’t exist, you will see a type error.
<Link
  to="/"
  onClick={() => setIsOpen(false)}
  className="flex items-center gap-3 p-3 rounded-lg hover:bg-gray-800 transition-colors mb-2"
  activeProps={{
  className:'flex items-center gap-3 p-3 rounded-lg bg-cyan-600 hover:bg-cyan-700 transition-colors mb-2',
  }}>
When we run the dev server, a file is auto generated that contains all the routes in our application with their types. This file is routeTree.gen.ts. You usually don’t have to touch this file, but it’s good to know that this file exists. If you open it, you will see that it contains all the routes in your application with their types. After you open it once, you might see that the red squiggly lines in your route files disappear because now the file is added to the context of the project.
Creating New Routes #
Static Routes #
If we want to create a new route called about, we can simply create a new file called about.tsx inside the src/routes folder. When I do it immidiately filled the file with a boilerplate code for the route. This is done through TanStack CLI.
import { createFileRoute } from '@tanstack/react-router'

export const Route = createFileRoute('/about')({
  component: RouteComponent,
})

function RouteComponent() {
  return <div>Hello "/about"!</div>
}
TanStack assumes that the route name matches the file name. So in this case, the route is /about because the file name is about.tsx. Now of you visit http://localhost:3000/about, you will see the content of the RouteComponent being rendered.
Dynamic Routes #
Having the ability to create dynamic routes is very common pattern in web development. In TanStack Start, creating dynamic routes is very straightforward. Let’s say we want to create a route for user profiles, where the URL contains the user ID. We can create a new file called user.$id.tsx inside the src/routes folder. The $ sign indicates that this part of the URL is dynamic.
import { createFileRoute } from '@tanstack/react-router'

export const Route = createFileRoute('/user/$id')({
  component: RouteComponent,
})

function RouteComponent() {
  return <div>Hello "/user/$id"!</div>
}
To access the dynamic parameter in the component, we can use the useParams hook from TanStack Router.
import { createFileRoute } from '@tanstack/react-router'

export const Route = createFileRoute('/user/$id')({
  component: RouteComponent,
})

function RouteComponent() {

    const { id } = Route.useParams()

  return <div>Hello "/user/{id}"!</div>
}
Now, if you visit http://localhost:3000/user/4, you will see “Hello /user/4!” being rendered, where 4 is the dynamic user ID.
Not Found Route #
If you navigate to a route that doesn’t exist, you will see a default 404 page. However, we can customize the Not Found route by going to the src/routes/__root.tsx and customizing the Route component. Inside the object, you can apply a notFoundComponent property to define a custom component for the Not Found route.
export const Route = createRootRouteWithContext<MyRouterContext>()({
  head: () => ({
    meta: [
      {
        charSet: 'utf-8',
      },
      {
        name: 'viewport',
        content: 'width=device-width, initial-scale=1',
      },
      {
        title: 'TanStack Start Starter',
      },
    ],
    links: [
      {
        rel: 'stylesheet',
        href: appCss,
      },
    ],
  }),

  notFoundComponent: () => <div>404... There's nothing here.</div>,

  shellComponent: RootDocument,
})
This 404 component will be rendered whenever a user navigates to a route that doesn’t exist in our application. But we can also create a custom Not Found page for a specific route as well. For example, if we want to create a Not Found page for the user route, we can define a notFoundComponent property in the user.$id.tsx file.
import { createFileRoute, notFound } from '@tanstack/react-router'

export const Route = createFileRoute('/user/$id')({
  component: RouteComponent,

  notFoundComponent: () => <div>User not found.</div>,

  loader: ({ params }) => {
    if (Number(params.id) > 10) {
      throw notFound()
    }
  },
})

function RouteComponent() {

    const { id } = Route.useParams()

  return <div>Hello "/user/{id}"!</div>
}
In this example, if the user ID is greater than 10, we throw a notFound error in the loader function, Route Loader is a one of the nost important concepts in TanStack Start. Imagine if you are in a situation where you only want to allow access to a route if certain conditions are met, like the user is authenticated or the data exists. In such cases, you can use the loader function to perform these checks before rendering the component.